
| Drawstring Bags and Purses
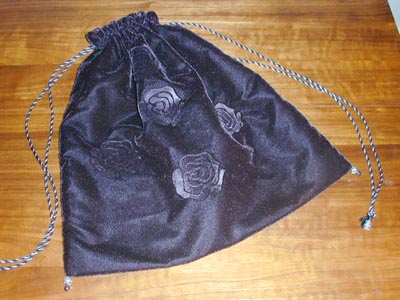
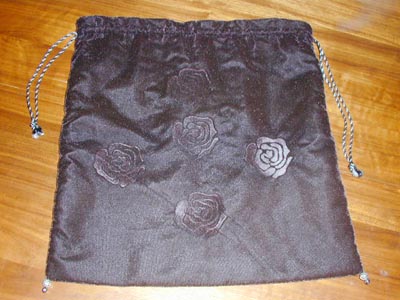
Drawstring bags make great little purses or lovely wrappings for gifts. You can decorate them in a myriad of ways or leave them simple. In the bag pictured, I used black velvet for the outside and black satin for the inside. I also stamped the velvet with a rose design. You can decorate the outside fabric with embroidery, patchwork, quilting, ribbon, lace, appliques, fabric paint, etc. Or just use scraps of pretty fabric leftover from another project (or from the remnant bin at the fabric store). Satin and other slick fabrics make good lining materials.
Start with a long rectangle of fancy fabric. Fold it in half and trim the three unfolded sides to form a square. If you are using this as a gift bag, use the size and shape of your gift as a guide. For example, these bags are perfect wraps for wine bottles. Lay the wine bottle on the fabric with the bottom of the bottle two inches above the fabric fold. Measuring two inches on each side of the bottle, cut along the two long sides of the bottle. Then add four or more inches above the top of the bottle, and cut that side. Cut the same shape out of the plain fabric for your lining. Now that you've cut the fabric shape, it's time to decorate the outside fabric. Add any embellishments you choose now. If you sew on trim or ribbons in horizontal lines, make sure to extend the trim to the very edge of the fabric. This way, it will be enclosed in the final seam and give a clean finish. With right sides together, sew the outside fabric's side seams. Then sew the side seams of the lining fabric. Iron these seams open. Turn the lining right-side out and place it inside the fancy fabric so that the right sides of each piece are facing each other (the wrong sides will be facing you). Match the side seams, and pin the open top edges together. Sew along the top edge and leave an opening of about two inches (more for a bigger bag, less for a tiny bag). Turn the bag right-sides out through this opening. Push the lining (right-side out) inside the fancy fabric side. Iron the top edge, turning the raw edges of the opening down. Hand-stitch the opening closed.
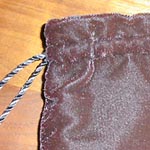
Now you'll make a casing for the drawstring. An inch or so from the top edge of the bag, stitch a line through the two layers (lining and outer fabric), all around the bag. If you want more of a ruffled edge at the top of the bag, start this line of stitching farther from the top edge. Then stitch another line about a half inch below the first line. At both side seams, use a seam ripper to unpick the side stitching in between the two lines of casing stitches. Cut the cord or ribbon into two long, equal pieces. Take a safety pin and attach it to one end of one piece of cord or ribbon. Insert the safety pin into the side-seam hole and thread it through the casing all the way around the bag, until it comes out next to where it started. Do the same with the other piece of cord or ribbon, but start at the opposite side. On each side, knot the cut ends of the cords to each other.
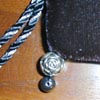
If you wish, you can sew beads or tassels at each corner of the bag. Use a needle and thread, and start from the inside of the bag so the knot is hidden. You can string any number of beads at each corner, or just tack on a pretty tassel.
|
Gothic Martha Stewart Pages
starting : shopping : motifs : projects : weddings : notes